The Concept
I’ve been sitting on this one for a little while, but I recently completed a project that I had been working on for roughly a year: A Modular LEGO Dungeons and Dragons display case/frame.
I’ve seen plenty of things a bit like this, but I wanted to make one even better, with the following extra criteria:
- I must be able to change the background, if I get bored of the current one.
- I must be able to open it from the front. What’s the point of LEGO if you can’t make changes? I didn’t want to have to take it off the wall and risk breaking the metal pieces that hold the back in place.
- I wanted name plates for the figures. If I look at it, I want to be able to read what they are, rather than trying to remember. It also makes answering other people’s questions easier.
- I wanted as much of each figure to be visible as possible.
The Components
- The figures. I used the BrickSearch App to ensure that I didn’t get any duplicates. Many thanks to the Smyths employee who also helped with his own scanner. £42 in total.
- The frame is a IKEA SANNAHED frame. More details in the method section. £5.
- The backgrounds are the official Dungeons and Dragons 2023 calendar. Cheap because it was out of date. £3
- Hooks and hinges. Just got some that were the right size from Amazon. Difficult to pin down the exact price as I’ve got lots left over. Dividing the total by what I used is £1.09
- Superglue. Another one that’s hard to pin down as I didn’t use all of it. Maybe £2
- Extra LEGO. I actually had this spare in a box from 30 years ago, but if you are to repeat this you may need to buy your own. £0
Total cost £53-ish
The Method
It’s a bit difficult to describe this chronologically, as each design decision influenced all the others (for the most part)
The Outer Frame
After getting the figures I created a proof of concept frame out of spare LEGO bits. This allowed me to determine what space each figure needed. Giving each figure the same amount of space gave me the required dimensions for the frame.
Hence my choice in what to buy.
Skipping ahead a bit (but staying focused on the outer frame) I got my dad to cut the frame in half. He has access to a table saw, but I do not. Then it was a simple matter of attaching the hinges on one side, the hook and eye-latch on the other.
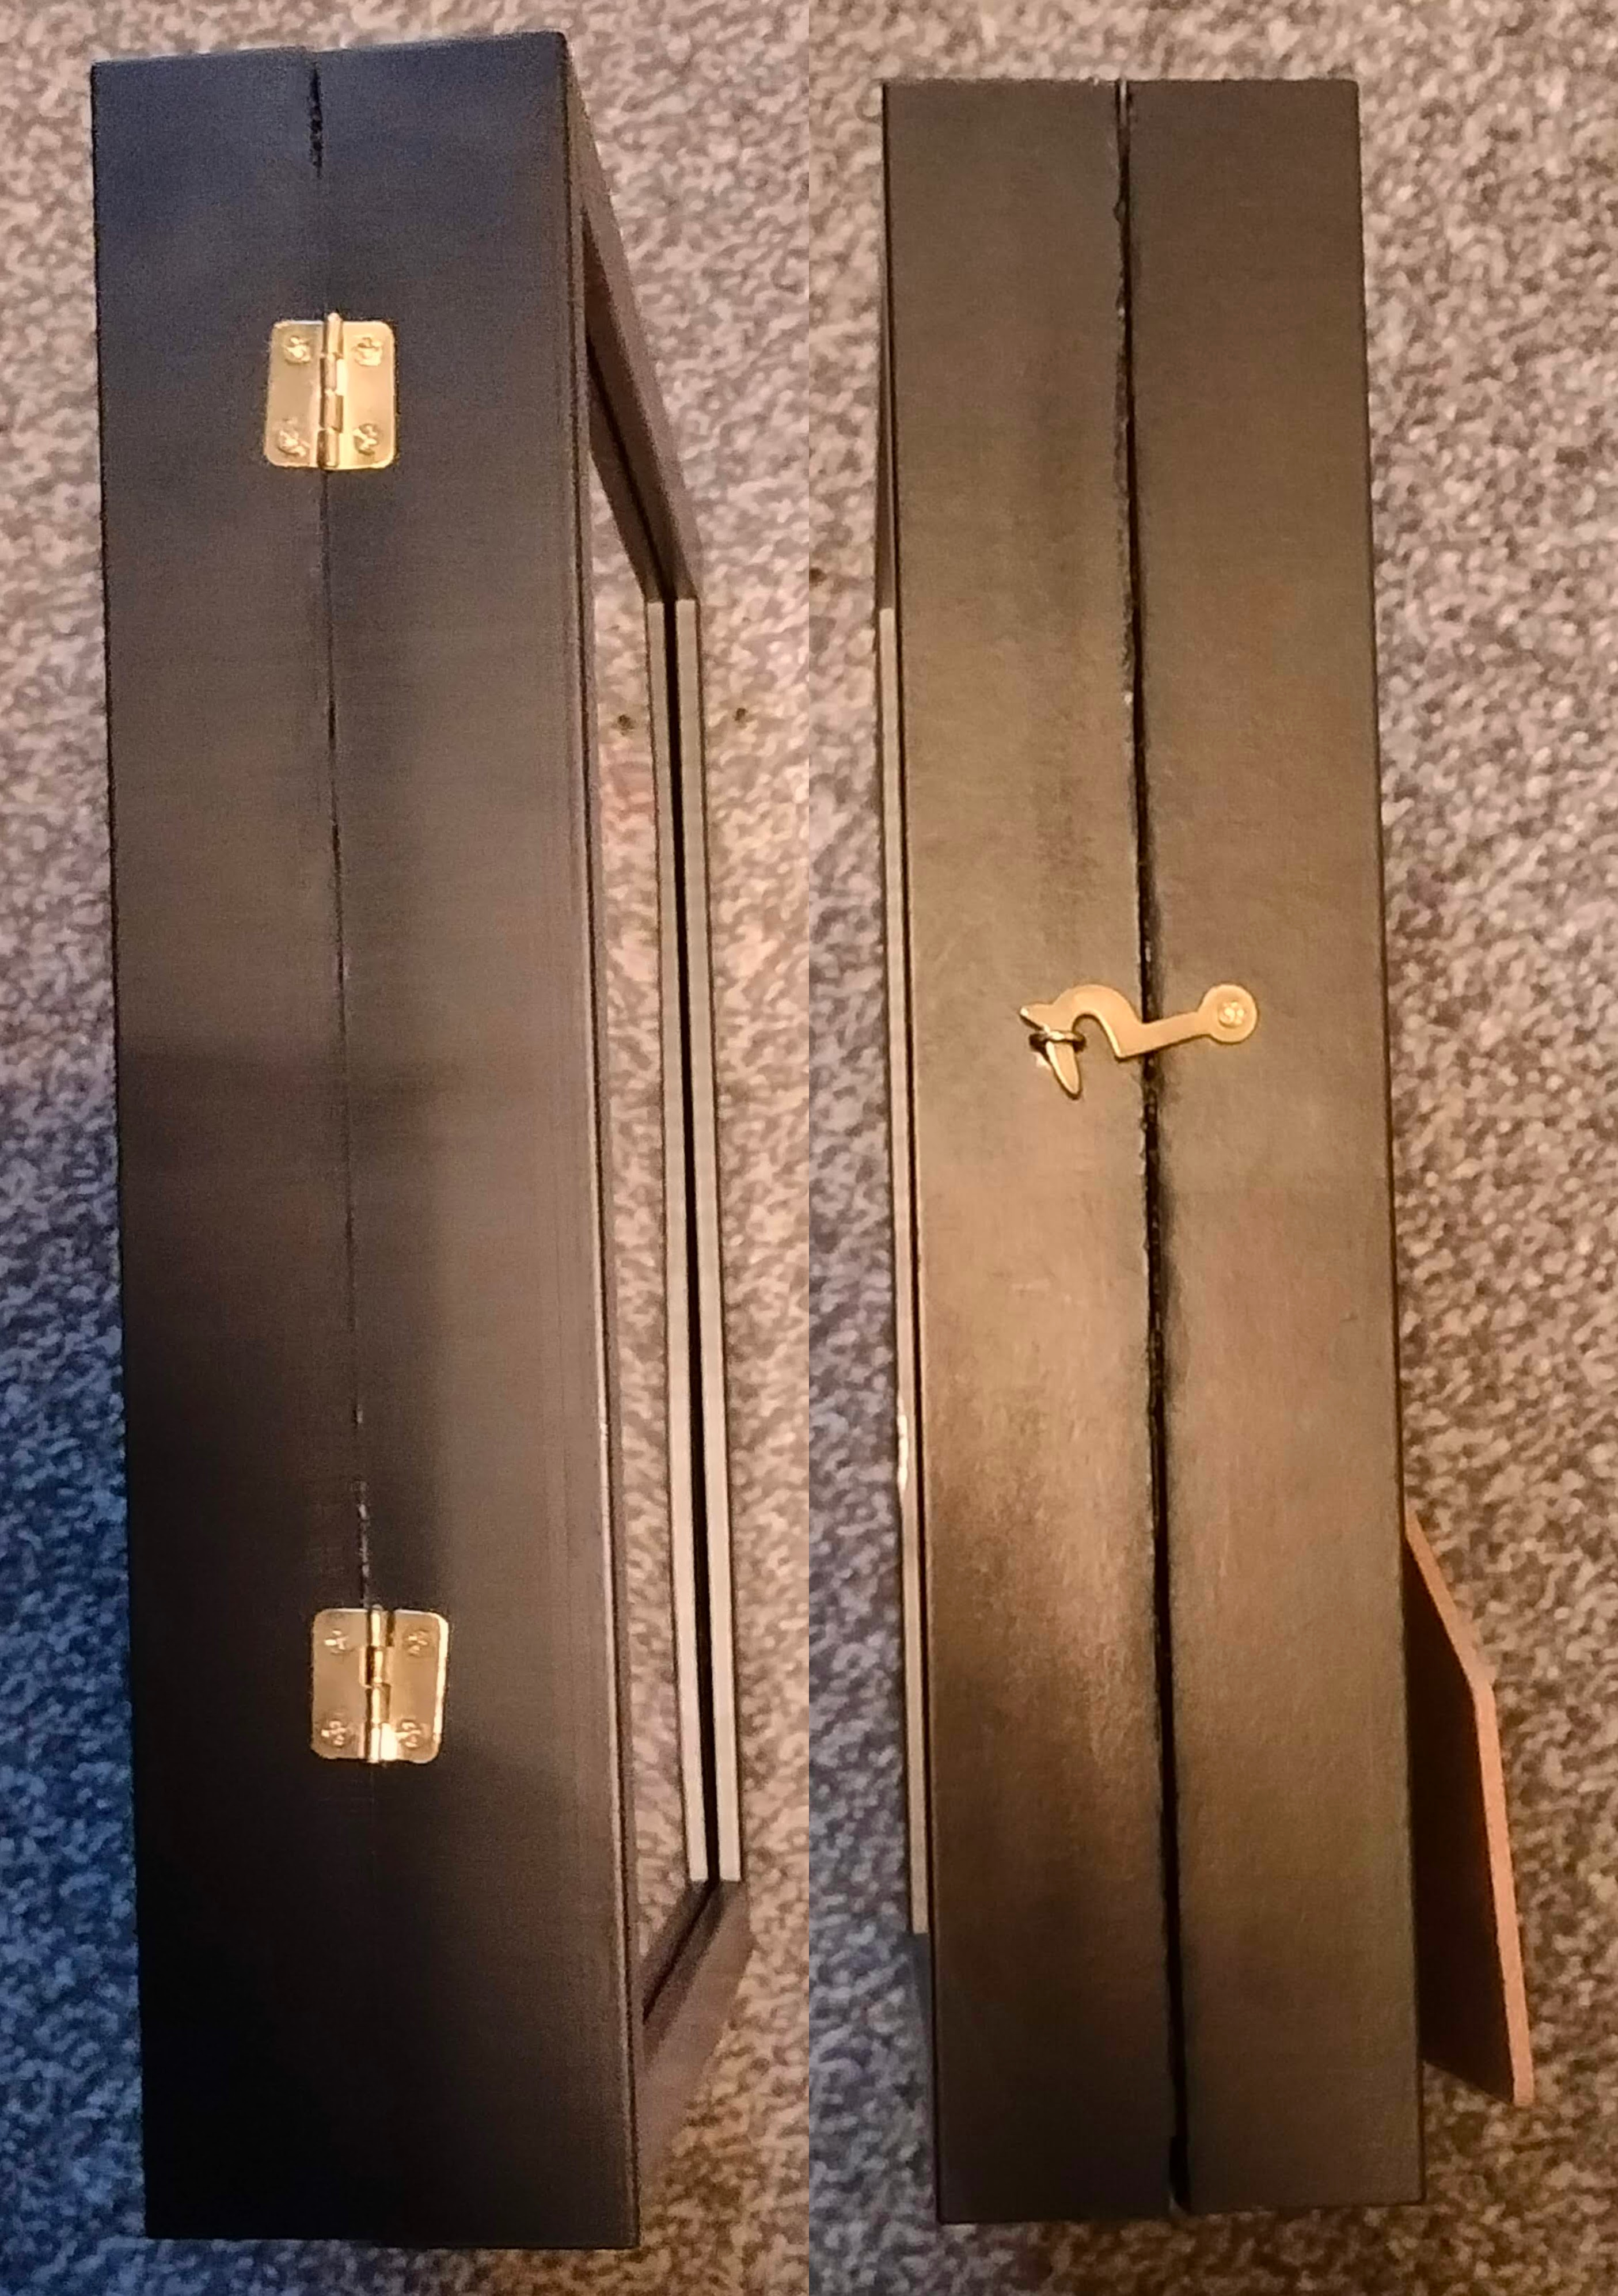
Hinges (left) and latch (right)
The Stands
For stability, I wanted to make sure the stand was at least two plates tall. I also wanted nameplates as previously mentioned, and for them to not obscure the figures.
Since each name plate would be 1 brick high, and they would need to be supported by the stand, that would mean that mean that the stand would need to consist of a single plate on the bottom, and then enough LEGO to fill space one brick high and all but one brick in the length.
I did that using yet more plates, rather than bricks, because I also wanted to use the plates that were included with the figures (and for them to be detachable) Doing so would mean that the background could be held in place by the figure’s base, and I could detach the base in order to change the background.
I realise I’ve worded that in a confusing way, so here is a diagram.
%20-%202)'%20height='96'%20x='calc((4%20*%2080)%20-%202)'%20y='23'%20fill='yellow'%3e%3c/rect%3e%3crect%20width='48'%20height='17'%20x='calc((4%20*%2080)%20-%202%20+%2015)'%20y='6'%20fill='yellow'%3e%3c/rect%3e%3c/g%3e%3cg%20name='character-plate'%3e%3crect%20width='calc((3%20*%2080))'%20height='32'%20x='78'%20y='23'%20fill='green'%3e%3c/rect%3e%3crect%20width='48'%20height='17'%20x='175'%20y='6'%20fill='green'%3e%3c/rect%3e%3c/g%3e%3cg%20name='back-layer-3'%3e%3crect%20width='calc((4%20*%2080)%20-%202)'%20height='32'%20x='0'%20y='54'%20fill='red'%3e%3c/rect%3e%3crect%20width='48'%20height='17'%20x='15'%20y='38'%20fill='red'%3e%3c/rect%3e%3crect%20width='48'%20height='17'%20x='95'%20y='38'%20fill='red'%3e%3c/rect%3e%3crect%20width='48'%20height='17'%20x='175'%20y='38'%20fill='red'%3e%3c/rect%3e%3crect%20width='48'%20height='17'%20x='255'%20y='38'%20fill='red'%3e%3c/rect%3e%3c/g%3e%3cg%20name='back-layer-2'%3e%3crect%20width='calc((4%20*%2080)%20-%202)'%20height='32'%20x='0'%20y='86'%20fill='grey'%3e%3c/rect%3e%3crect%20width='48'%20height='17'%20x='15'%20y='70'%20fill='grey'%3e%3c/rect%3e%3crect%20width='48'%20height='17'%20x='95'%20y='70'%20fill='grey'%3e%3c/rect%3e%3crect%20width='48'%20height='17'%20x='175'%20y='70'%20fill='grey'%3e%3c/rect%3e%3crect%20width='48'%20height='17'%20x='255'%20y='70'%20fill='grey'%3e%3c/rect%3e%3c/g%3e%3cg%20name='base'%3e%3crect%20width='calc((5%20*%2080)%20-%202)'%20height='32'%20x='0'%20y='118'%20fill='blue'%3e%3c/rect%3e%3crect%20width='48'%20height='17'%20x='15'%20y='101'%20fill='blue'%3e%3c/rect%3e%3crect%20width='48'%20height='17'%20x='95'%20y='101'%20fill='blue'%3e%3c/rect%3e%3crect%20width='48'%20height='17'%20x='175'%20y='101'%20fill='blue'%3e%3c/rect%3e%3crect%20width='48'%20height='17'%20x='255'%20y='101'%20fill='blue'%3e%3c/rect%3e%3crect%20width='48'%20height='17'%20x='335'%20y='101'%20fill='blue'%3e%3c/rect%3e%3c/g%3e%3c/svg%3e)
A side-view of the stand showing:
Nameplate (yellow), 5x4 plate (blue), 4x4 plate (grey and red), figure’s supplied 3x4 plate (green)
I also didn’t want any of the figures to become damaged. The one most at risk was the Tiefling, due to the tail. Thankfully there was enough space in the frame to extend the baseplate far enough to distance the Tiefling figure from the back of the frame. Barely.
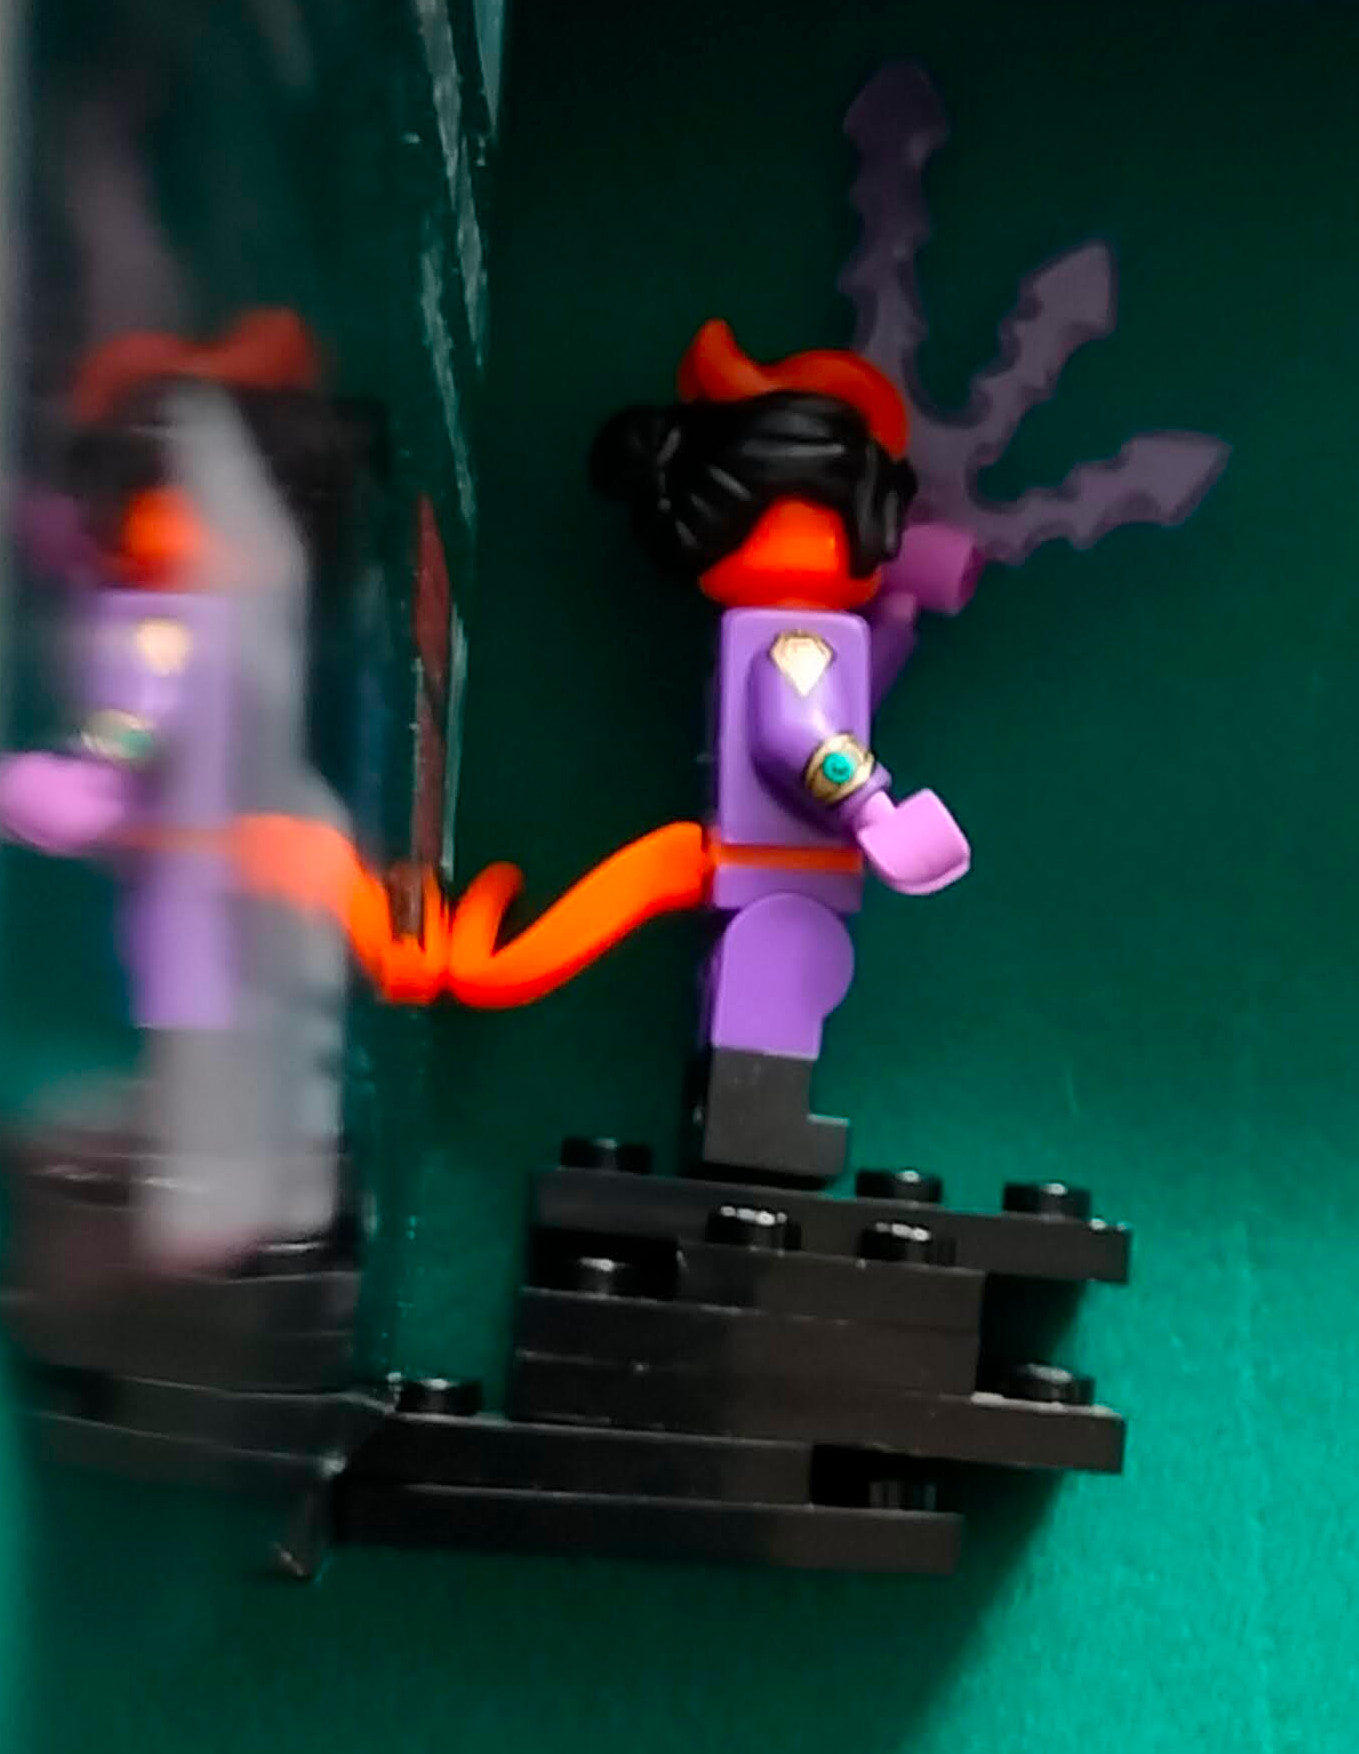
The Tiefling figure with it’s tail just touching the backing
All the stand pieces were superglued together (in some cases a bit too liberally).
The Backing
Inside of the frame is an additional black hollow rectangle divider. This supports the back of the frame, preventing it from falling forwards into the plastic, but it means that the actual back has slightly less usable space.

A front-view of the frame - blue is the outer frame, brown is the backing, and yellow is the inner frame
I drew a template on the back, taking this into account, and then divided it into the required 12 sections (4 columns, 3 rows).
Since the backing has a leg I would not be able to just lie it flat on a table, so instead I suspended it with the proof of concept frame. Using that, I was able to superglue the stands onto the backing (once again, using a bit too much glue).
The frame without a background
The Backgrounds
I removed the staples from the calendar, and then used the frame’s backing as a template to draw around. I then cut them into squares using a paper guillotine.
I used a spare piece (also cut into a square) to determine where the plates should go, cut out those holes, then used it as a template.
I placed it over each image, and using a scalpel, cut out the holes for the plates.
This had limited success, with the template sometimes sliding about despite my efforts. Certainly there will be a more precise way of doing this, but I’m not aware of it.
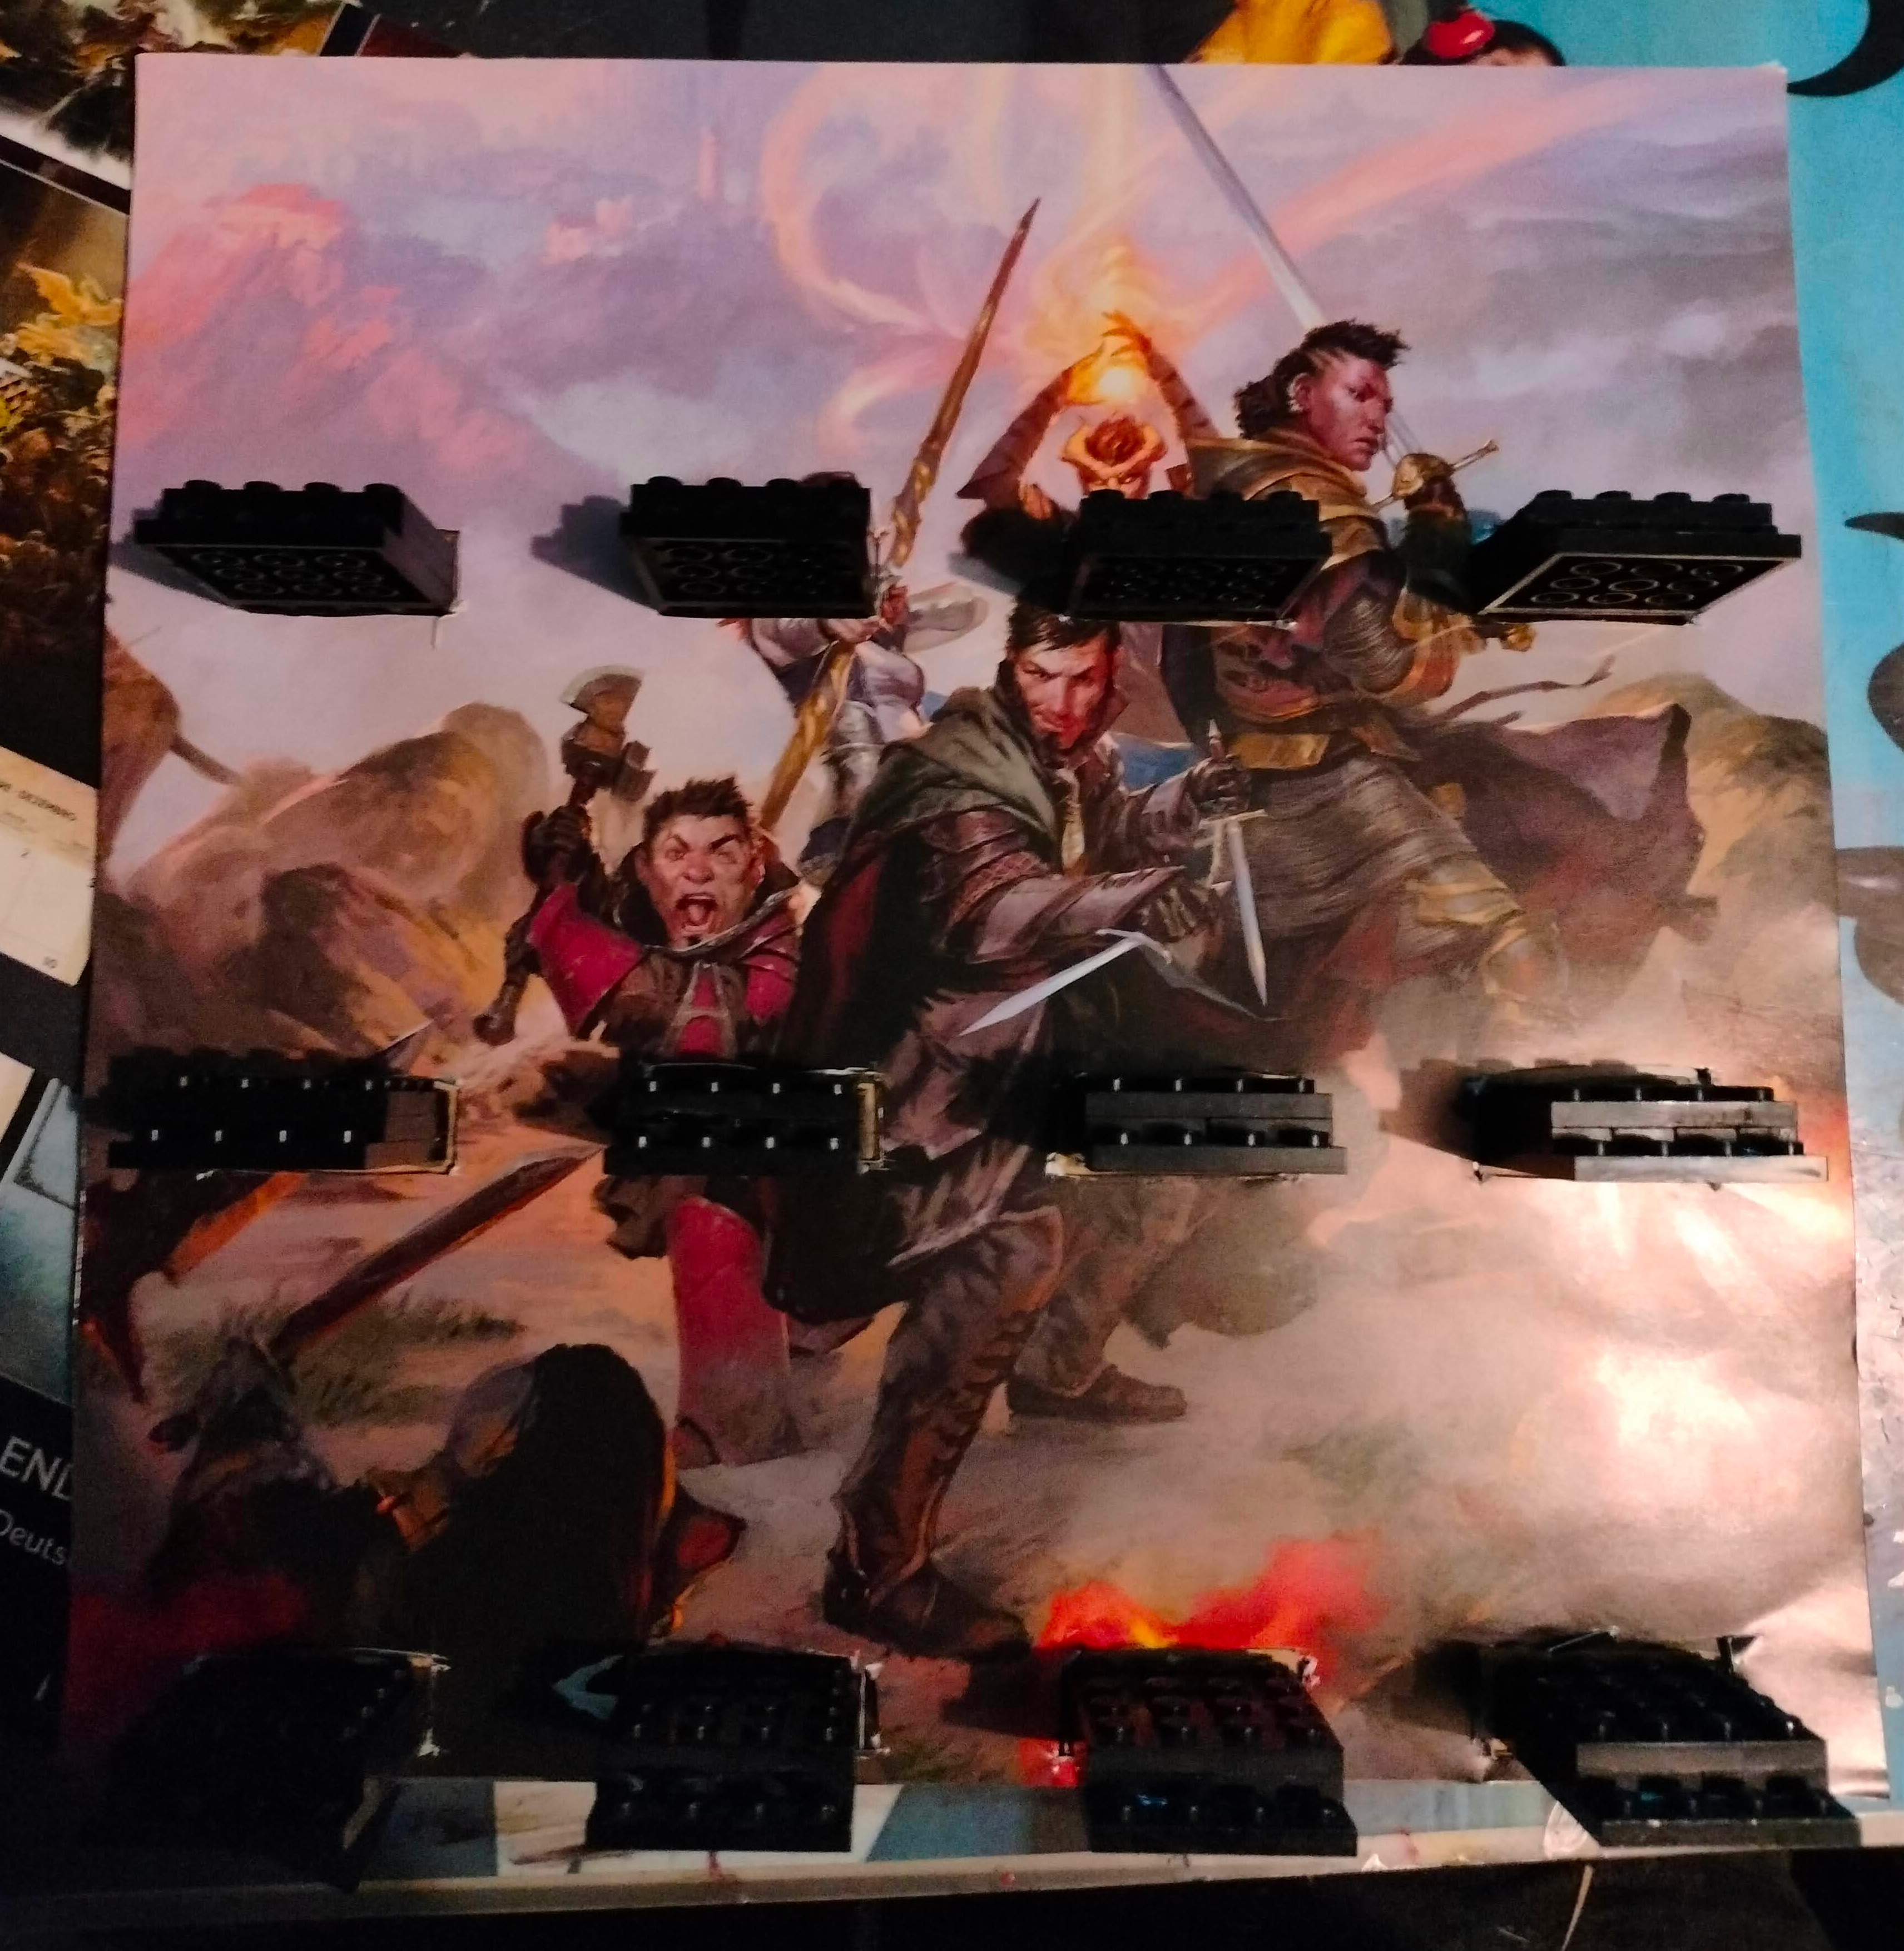
An example background of an adventuring party, with the stands poking through cut out holes
The Nameplates
I wanted to have nameplates for the figures, and for them to be interchangeable. After all, that’s part of the fun of LEGO.
I wrote out the names in a word document, white on a black background. I initially tried to go for a hand-written looking font, but I thought it looked terrible and was difficult to read.
After going through lots of fonts, I eventually settled on what I believe was “Book Antiqua”, so it looks clear but also evokes the feeling of being printed on an old manuscript.
Most of the labels were small enough to fit on 2-width blocks, some could thankfully fit on 1-width blocks (e.g. “von”, “of”) - only “Dragonborn” needed to find on a 3-width (yet, surprisingly, not “Aarakocra”)
I attached the labels to the blocks using a standard PVA glue stick.
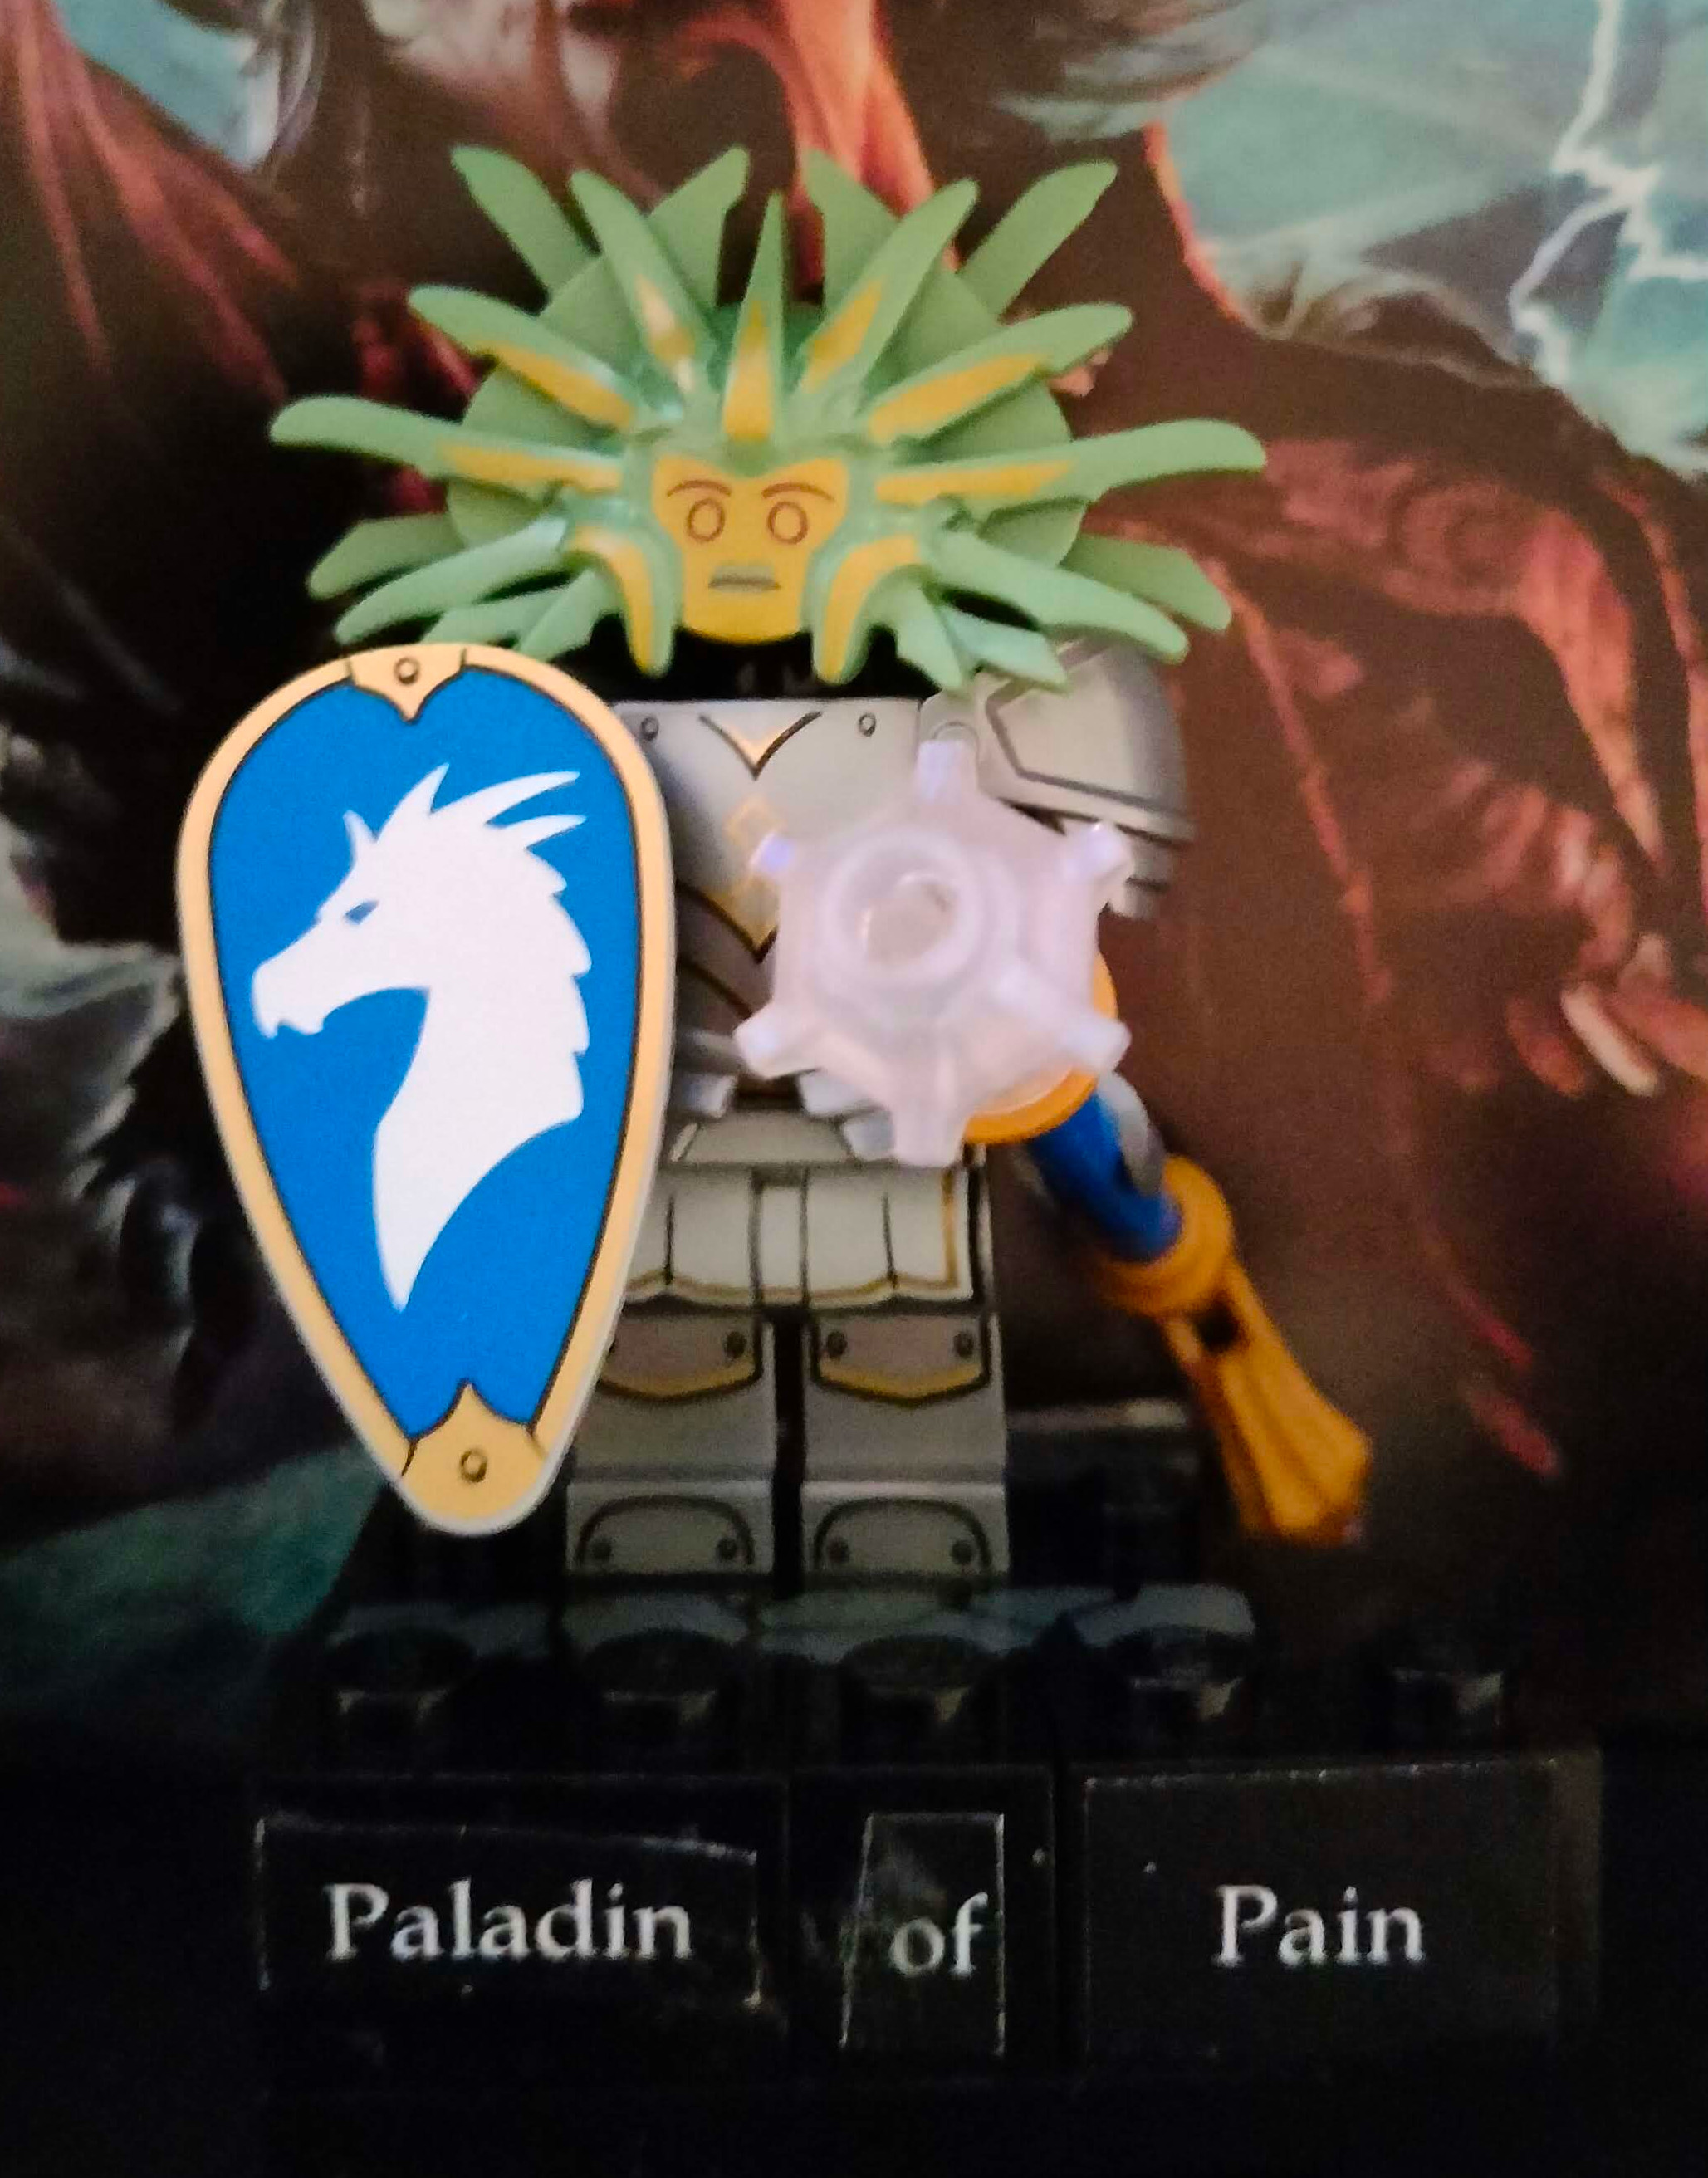
The Paladin of Pain
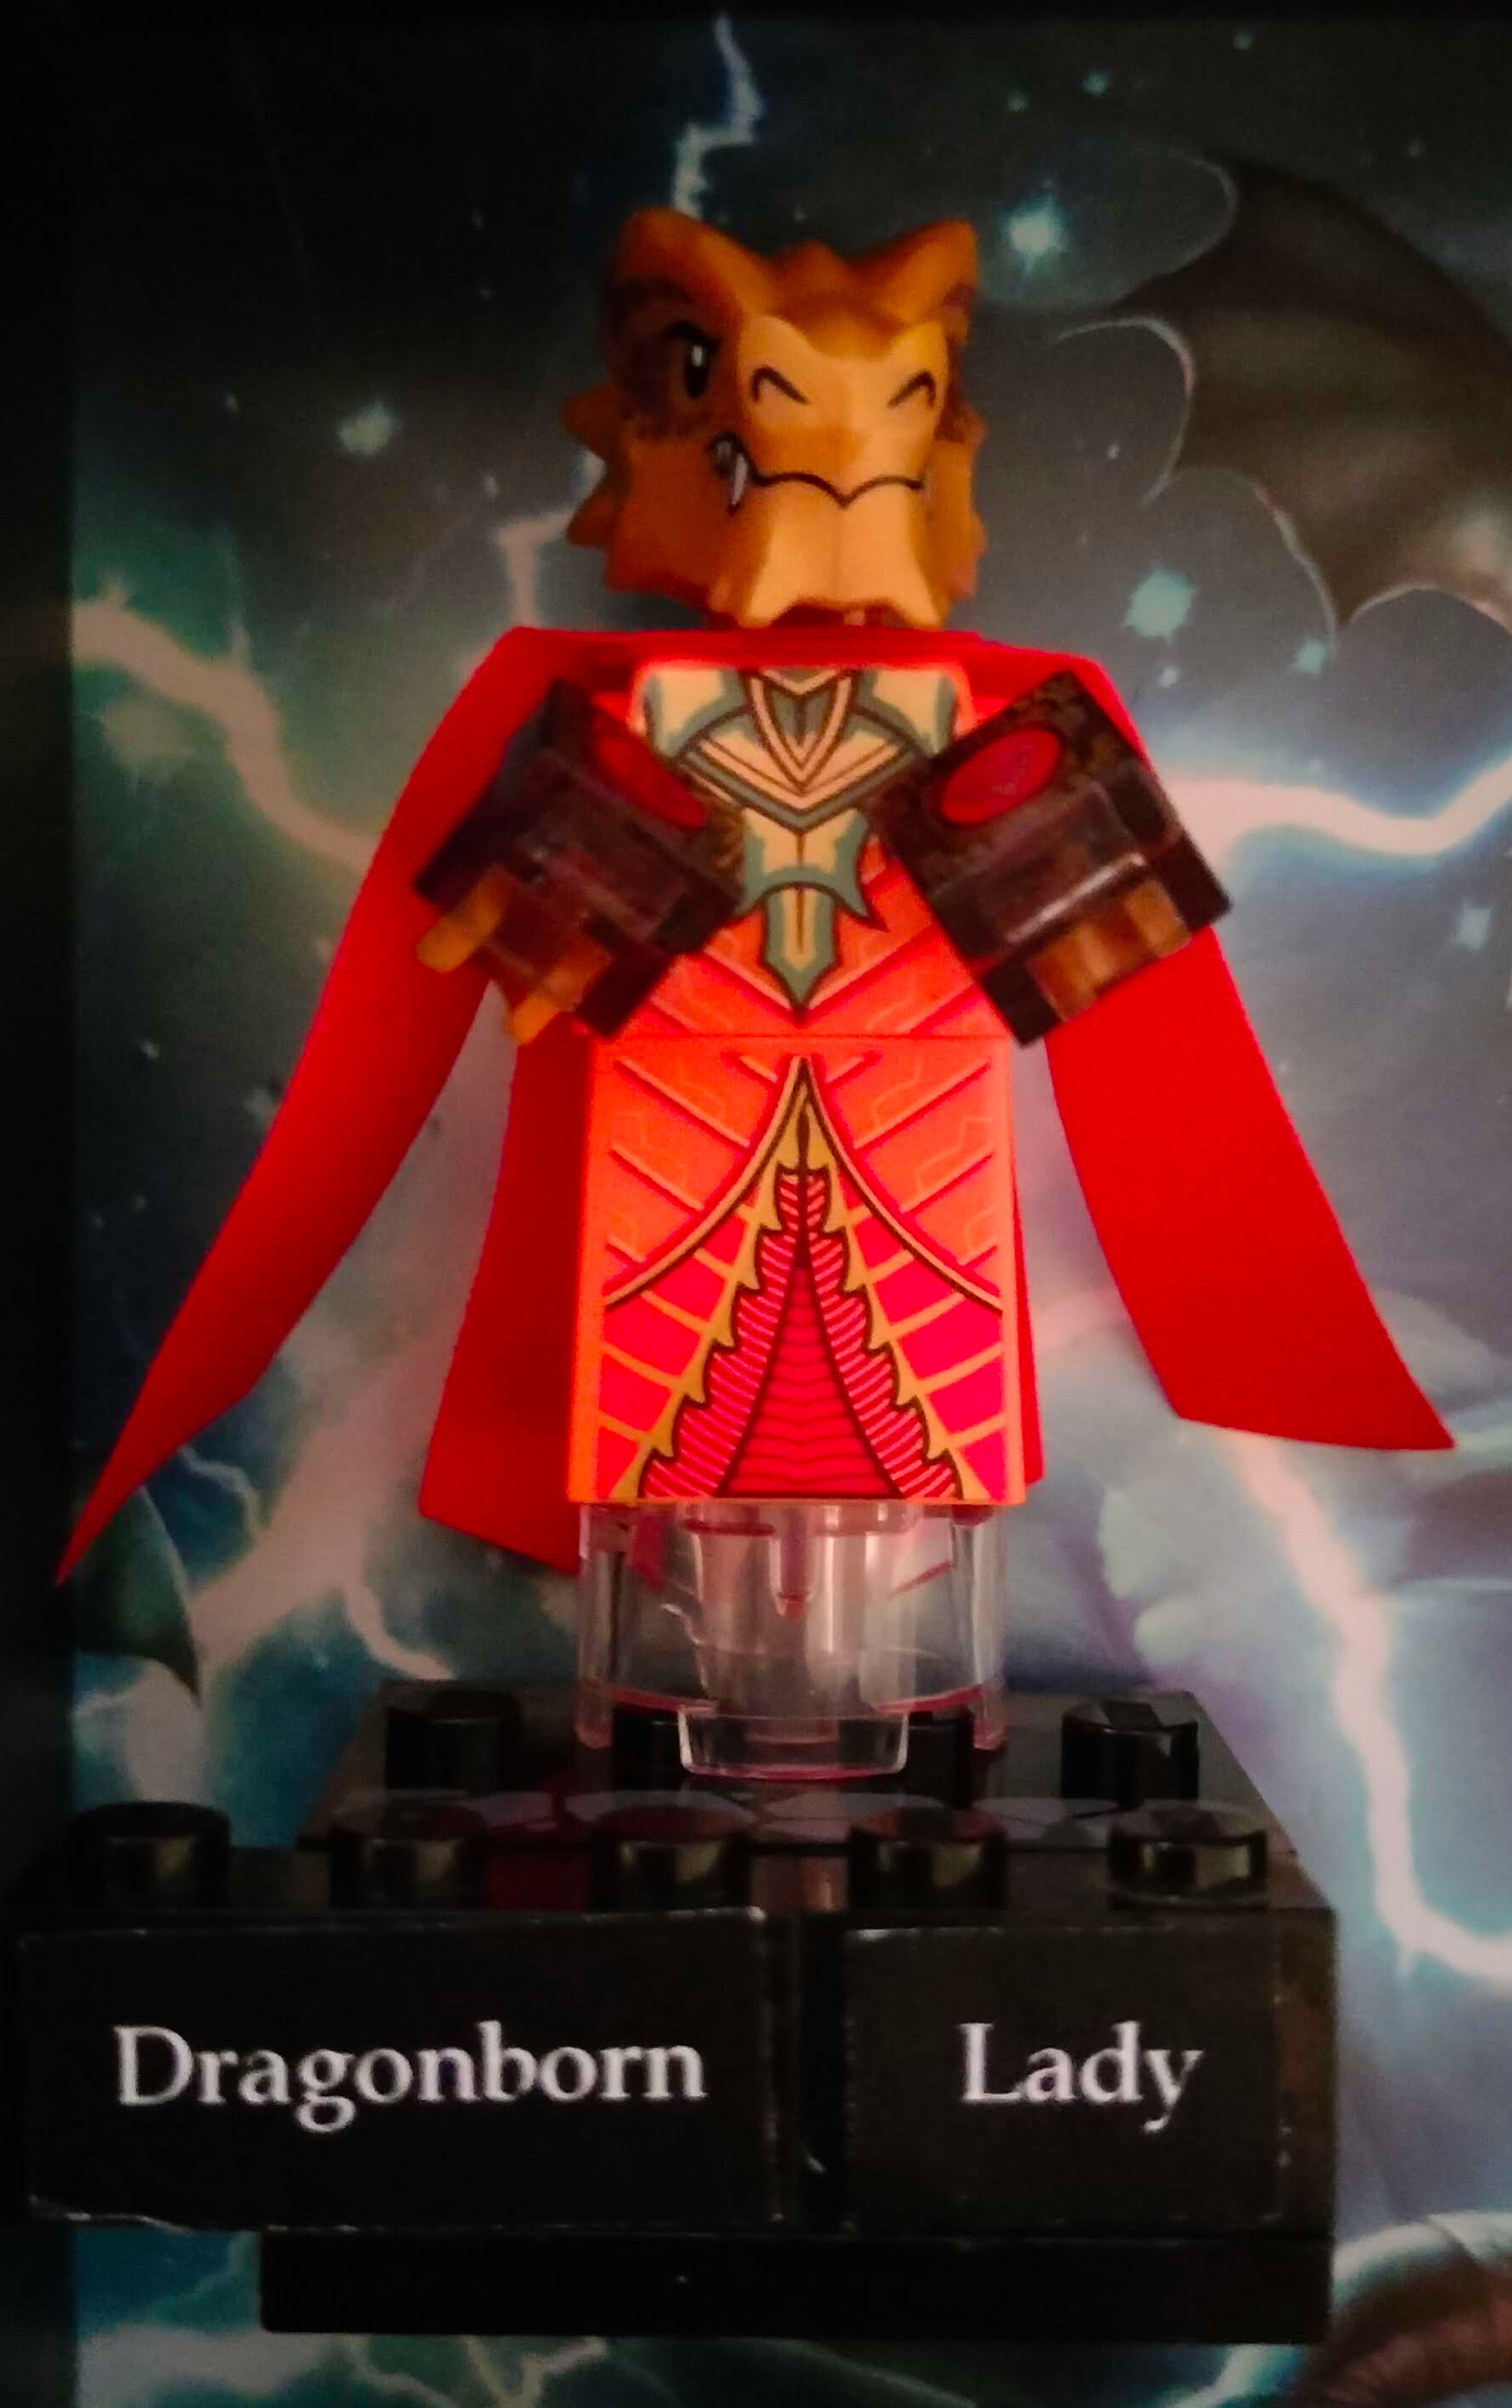
Dragonborn Lady
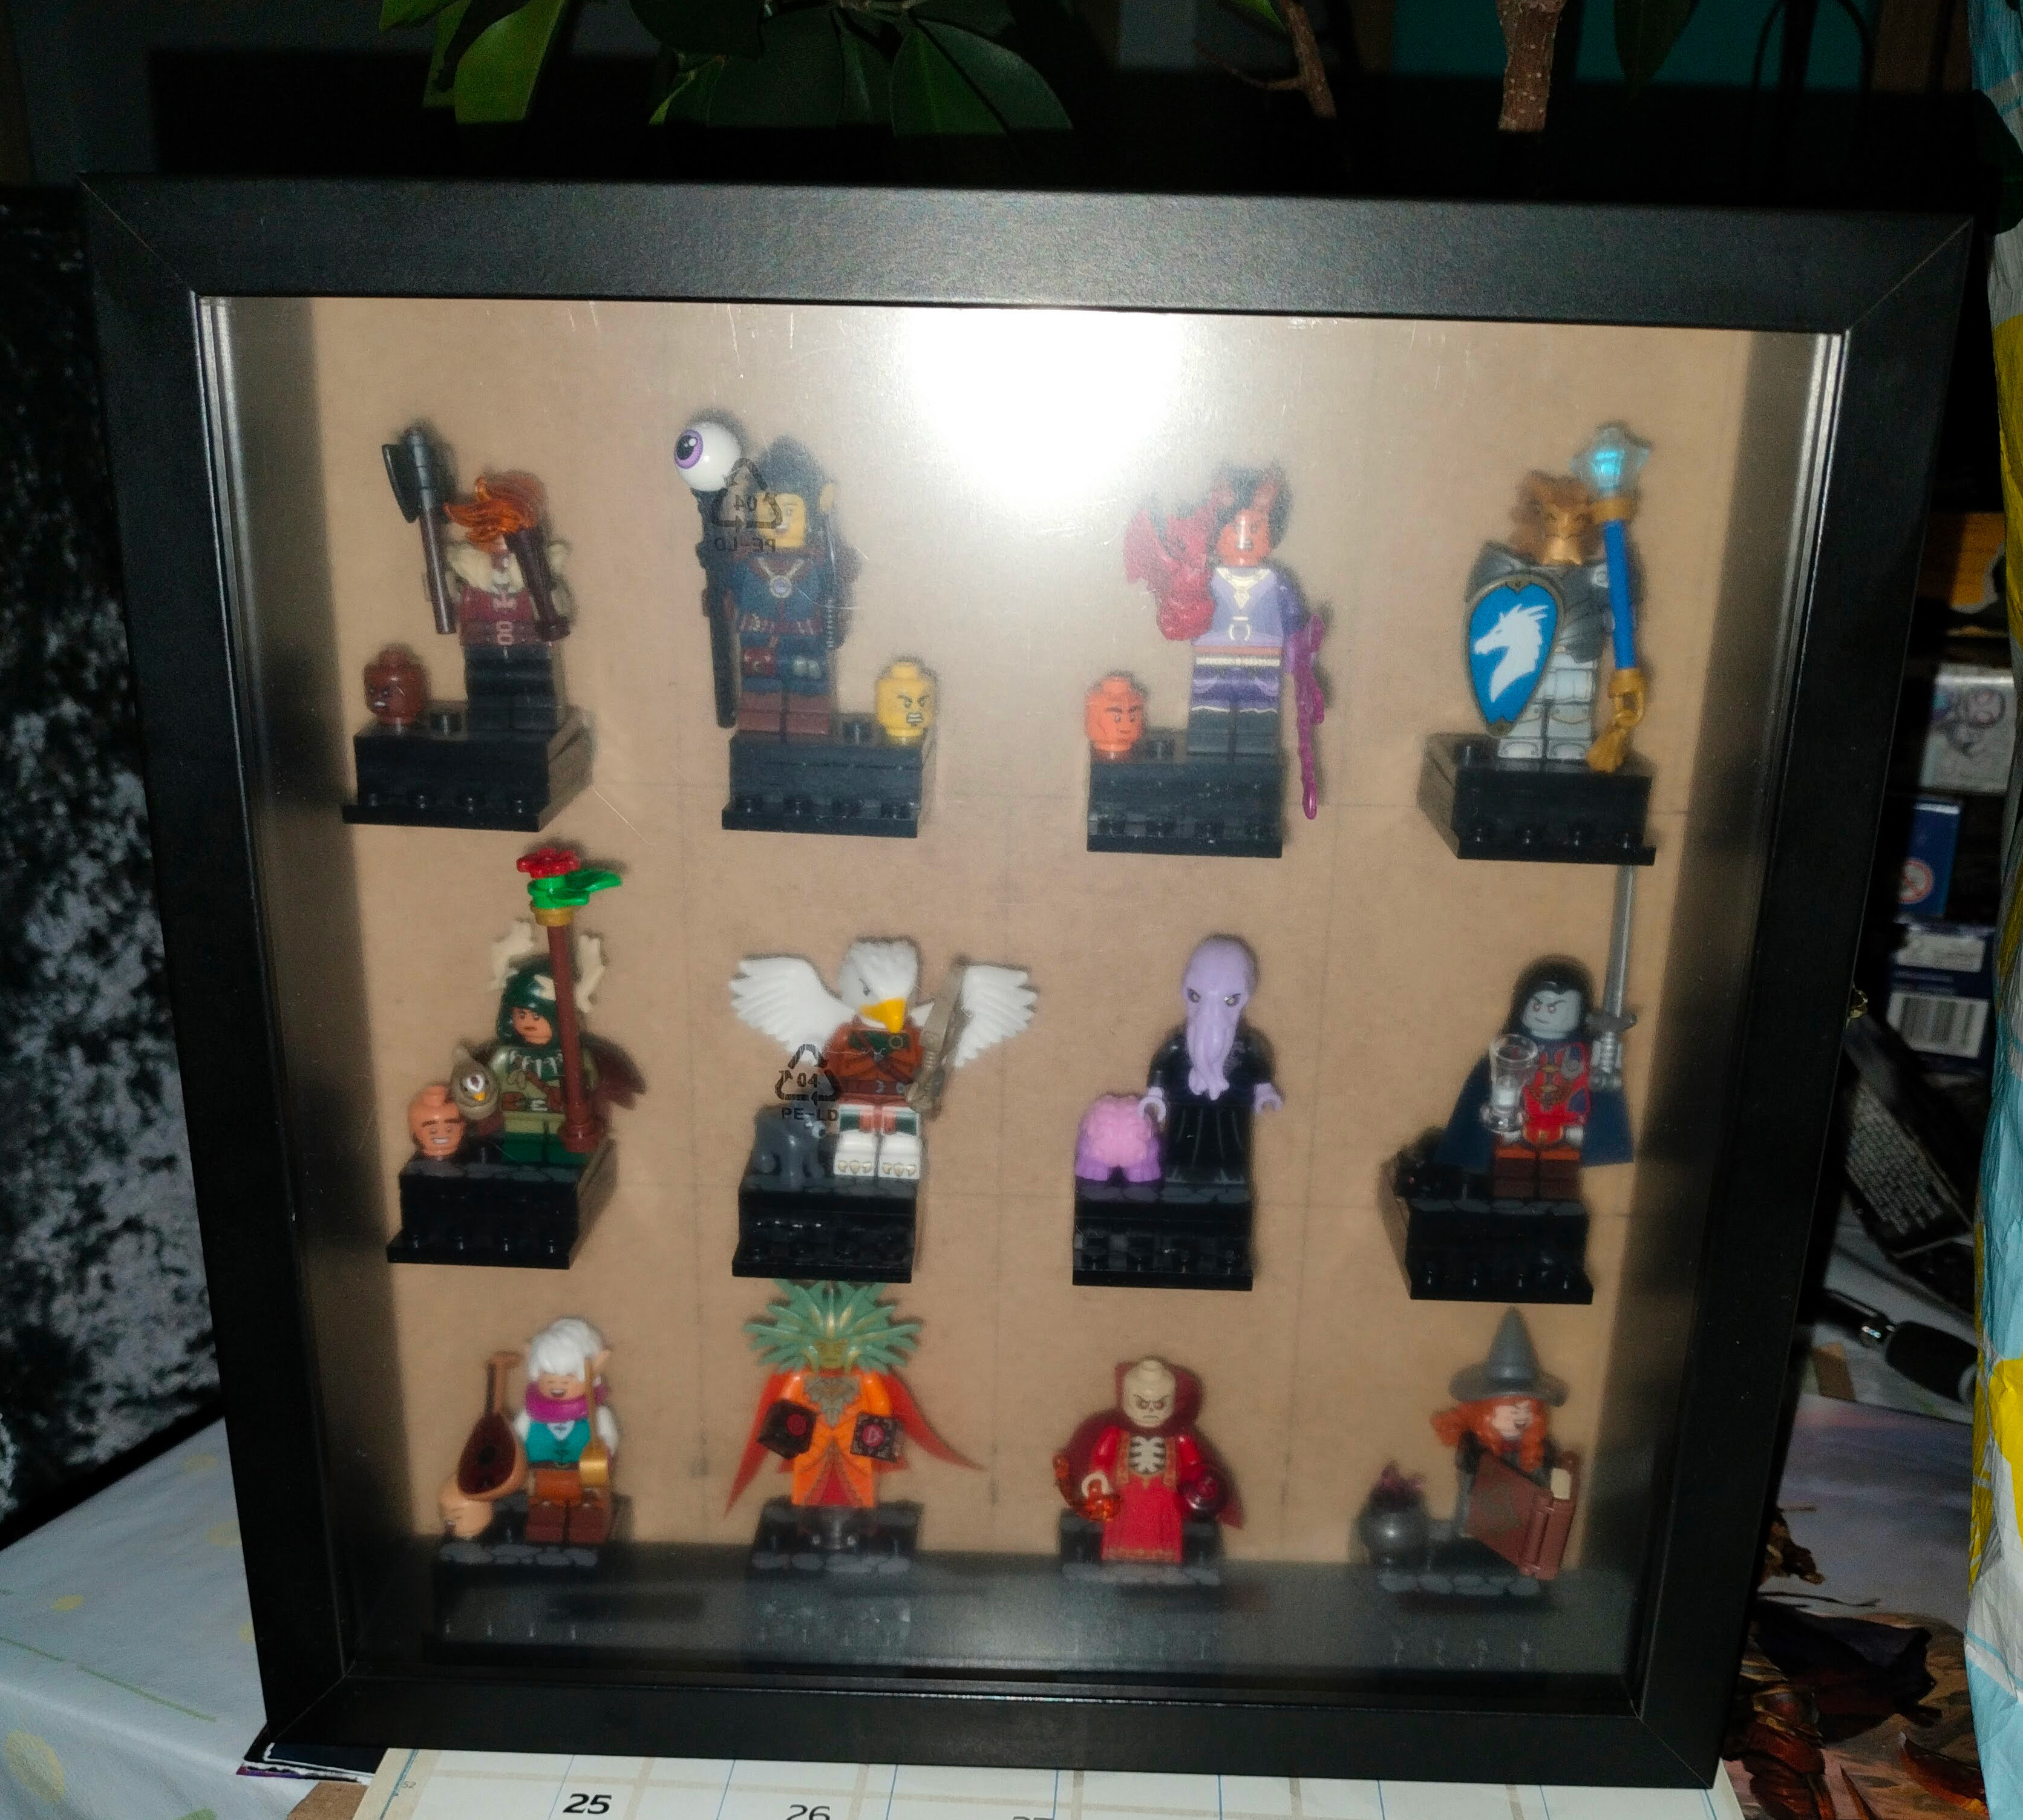
The Result
I’m very happy with the end result. Though some of the backgrounds have torn as they were put over the stands, and the glue makes parts a bit lumpy, it fits together and looks quite neat if you don’t inspect it too closely.

The completed frame